Kenmore Sewing Machine 12 Stitch Manual: A Comprehensive Guide
Having your Kenmore 12-stitch manual close by is incredibly helpful! Familiarity with the manual, even after a few reads, builds confidence.
It’s a valuable resource for all sewing projects.
Today’s date is 02/01/2026 17:23:58.
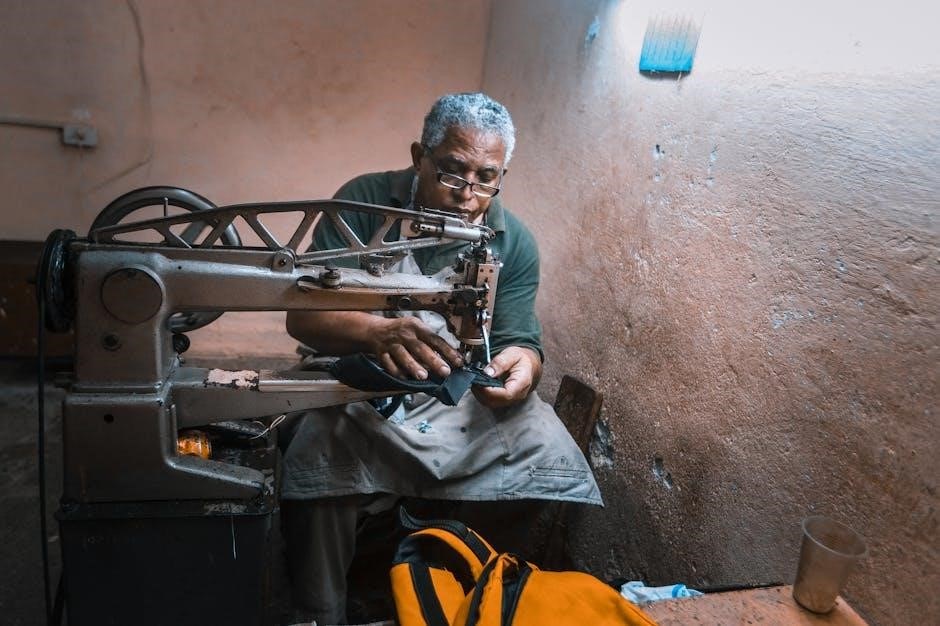
Welcome to the world of sewing with your Kenmore 12-Stitch Sewing Machine! This versatile machine is designed for both beginners and experienced sewists, offering a fantastic range of capabilities for various projects. Understanding its features and operation is key to unlocking its full potential.
The Kenmore 12-Stitch is a reliable workhorse, capable of handling everyday repairs, crafting beautiful garments, and tackling creative home décor. Its 12 built-in stitches provide options for straight stitching, zigzagging, buttonholes, and decorative embellishments.
As the owner, having your sewing manual readily available is paramount. It’s a resource you’ll return to time and again, especially when starting out. Don’t feel pressured to memorize everything immediately; instead, view the manual as a helpful companion.
With a little practice and guidance from this manual, you’ll quickly become comfortable with your machine. The more you use it, the more intuitive it will become. Remember, today, February 1st, 2026, is a great day to start a new sewing adventure!
Embrace the joy of creating!
Understanding Your Machine’s Components
Familiarizing yourself with the parts of your Kenmore 12-Stitch machine is the first step towards successful sewing. The machine comprises several key components working in harmony to create stitches.
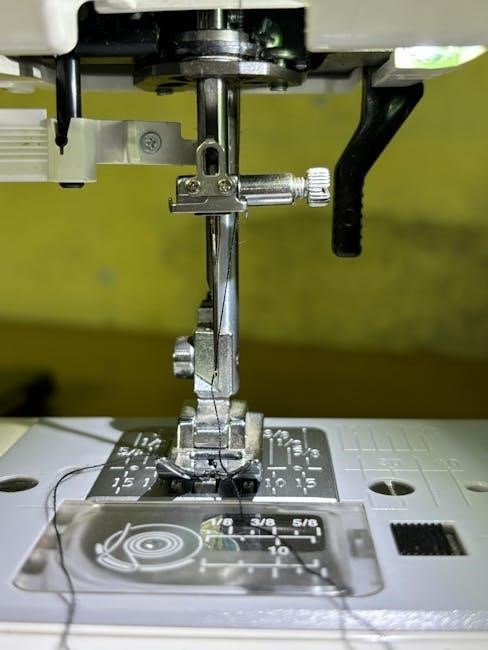
These include the power switch, controlling operation; the handwheel, for manual control; the stitch selector dial, choosing stitch patterns; the stitch length and width dials, adjusting stitch parameters; and the presser foot, holding fabric in place.
The needle pierces the fabric, guided by the needle clamp. Below the fabric lies the bobbin case and bobbin, forming the lower stitch. The tension discs regulate thread flow, crucial for balanced stitches. Don’t forget the thread take-up lever, ensuring even thread distribution.
Your manual is an invaluable guide to identifying each part and understanding its function. Refer to the diagrams within for clear illustrations. Knowing these components allows for easier troubleshooting and maintenance.
Remember, consistent reference to your manual, especially in the beginning, will build confidence and proficiency. Today, February 1st, 2026, is a perfect time to explore your machine’s anatomy!
A well-understood machine is a happy machine!
Threading the Kenmore 12-Stitch Machine
Correct threading is paramount for proper stitch formation on your Kenmore 12-Stitch machine. Always refer to the threading diagram in your manual – it’s your best friend! Begin by ensuring the machine is turned off and the presser foot is raised.
Place the spool of thread on the spool pin. Guide the thread through the first thread guide, then down and around the tension discs. This is a critical step; ensure the thread seats properly between the discs for correct tension.
Next, lead the thread up through the take-up lever and then down to the needle bar. Finally, thread the needle from front to back; A needle threader can be incredibly helpful here!
Remember to always lift the presser foot before threading, as this opens the tension discs. Double-check that the thread is securely seated in all guides and the needle. A properly threaded machine will produce even, consistent stitches.
Today, February 1st, 2026, take the time to practice threading until it becomes second nature. Your manual provides detailed illustrations and troubleshooting tips. A little patience goes a long way!
Mastering threading unlocks a world of sewing possibilities.
Winding the Bobbin
A consistently wound bobbin is essential for smooth, even sewing on your Kenmore 12-Stitch machine. Begin by placing the spool of thread on the spool pin, as you would for top threading. Then, guide the thread through the designated bobbin winding tension disc – this differs from the sewing tension disc.
Next, thread the end of the thread through a hole in the bobbin, and place the bobbin onto the bobbin winder spindle. Push the spindle to the right to engage the winding mechanism. Hold the thread tail firmly for the first few winds to prevent slipping.
Gently depress the foot pedal to start winding. The machine will automatically stop when the bobbin is full. Disengage the spindle, remove the bobbin, and trim the thread.
Ensure the bobbin is wound evenly, not too loose and not too tight. Uneven winding can cause tension issues and skipped stitches. Refer to your manual’s diagram for visual guidance.
Today, on February 1st, 2026, remember that consistent bobbin winding is a cornerstone of successful sewing. Practice makes perfect! Your manual offers specific instructions tailored to your machine model.
A well-wound bobbin is a happy bobbin, and a happy bobbin leads to happy sewing!
Selecting Stitches: A Stitch Guide
Your Kenmore 12-Stitch machine offers a versatile range of stitches for various sewing applications. The stitch selection dial allows you to choose from a variety of options, each suited for different fabrics and project types. Familiarizing yourself with these stitches is key to unlocking your machine’s full potential.
Straight stitches are ideal for constructing garments, quilting, and general sewing. Zigzag stitches provide elasticity and are perfect for finishing raw edges, creating decorative effects, and sewing knits. The buttonhole stitch, a specialized function, allows for creating professional-looking buttonholes.
Other stitches may include variations of zigzag for decorative purposes, or stretch stitches for working with highly elastic fabrics. Consult your manual’s stitch guide for detailed illustrations and recommended uses for each stitch.
Experiment with different stitch lengths and widths to achieve desired results. Remember, today is February 1st, 2026, and taking the time to test stitches on scrap fabric before starting your project will save you time and frustration.
Understanding the purpose of each stitch empowers you to tackle any sewing project with confidence! Your manual is your best resource for mastering stitch selection.
Straight Stitch: Basic Sewing
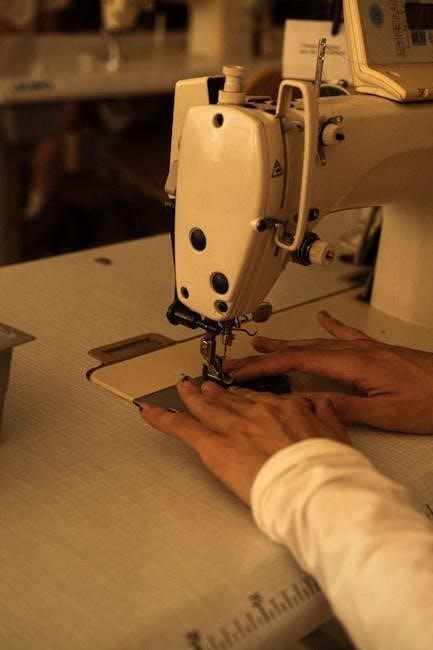
The straight stitch is the foundation of most sewing projects with your Kenmore 12-Stitch machine. It’s a simple, yet incredibly versatile stitch used for constructing seams, topstitching, and basting. Mastering the straight stitch is crucial for building a solid sewing skillset.
To begin, select the straight stitch option on your machine’s stitch dial. Adjust the stitch length according to your fabric weight and project needs – shorter stitches for delicate fabrics, longer stitches for heavier materials. A standard stitch length of 2.5mm is a good starting point.
Ensure your fabric is properly aligned under the presser foot and gently guide the fabric while the machine sews. Maintain a consistent seam allowance for accurate results. Remember to backstitch at the beginning and end of each seam to secure the stitches.
Today, February 1st, 2026, is a great day to practice! Consistent practice with the straight stitch will improve your control and precision. Refer to your manual for detailed instructions and troubleshooting tips.
A well-executed straight stitch is the hallmark of quality sewing. Don’t underestimate the importance of mastering this fundamental technique!
Zigzag Stitch: Applications and Adjustments
The zigzag stitch on your Kenmore 12-Stitch machine offers incredible versatility beyond basic seams. It’s ideal for finishing raw edges to prevent fraying, creating decorative embellishments, and sewing stretch fabrics. Understanding its adjustments unlocks a world of creative possibilities.
Select the zigzag stitch setting on your machine. The width and length are adjustable. A wider zigzag is perfect for securing fabric edges, while a narrower stitch is suitable for decorative applications. Stitch length impacts the density of the zigzag – shorter for tighter zigzags, longer for more open ones.
When working with stretch fabrics like knits, use a slightly longer stitch length and a medium width to allow for fabric movement without puckering. For decorative stitching, experiment with different width and length combinations to achieve unique effects.
Today, February 1st, 2026, is a perfect time to experiment! Your manual provides detailed guidance on adjusting the zigzag stitch for various fabrics and projects. Remember to test your settings on a scrap piece of fabric before sewing your final project.
Mastering the zigzag stitch expands your sewing capabilities significantly. It’s a powerful tool for both functional and decorative sewing.
Buttonhole Stitch: Step-by-Step Instructions
Creating buttonholes with your Kenmore 12-Stitch machine requires precision, but is achievable with careful attention to the manual’s instructions. Begin by selecting the buttonhole stitch setting. Your machine likely has a designated buttonhole foot – ensure it’s properly attached.
Most models require you to measure the button size and adjust the buttonhole length accordingly using the machine’s dial or settings. Place the fabric under the presser foot, aligning the fabric where you want the buttonhole to begin.
Slowly lower the presser foot and begin sewing. The machine will automatically stitch the buttonhole outline. It will stop and prompt you to rotate the fabric, usually 90 degrees, before continuing. Repeat this rotation and stitching process until the buttonhole is complete.
Today, on February 1st, 2026, take your time! Carefully follow the manual’s diagrams. After completing the buttonhole, gently remove the fabric and use the buttonhole opener (often included with the machine) to create a clean opening.
Practice on scrap fabric first to perfect your technique. A well-executed buttonhole adds a professional finish to your projects.
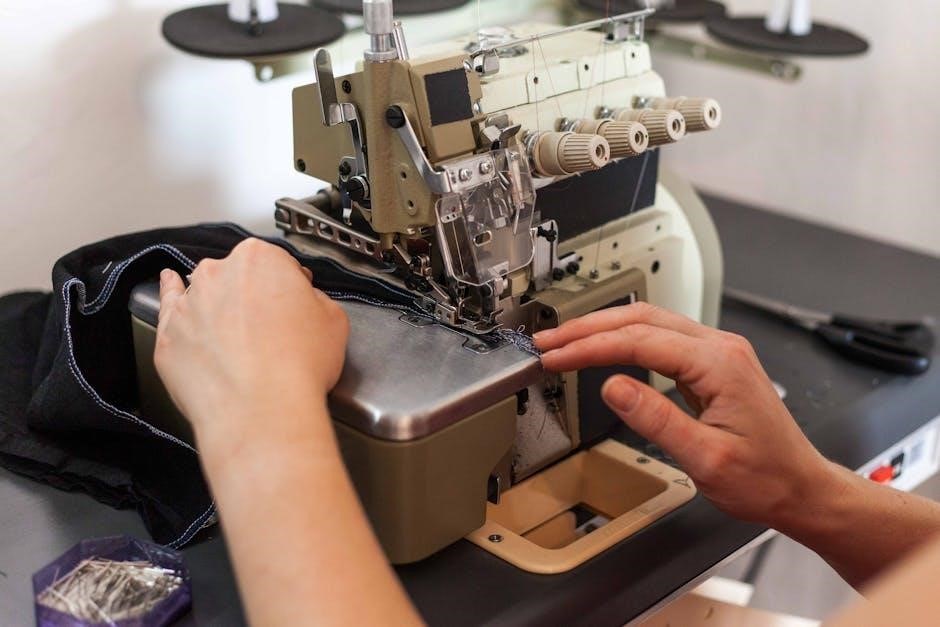
Overlock Stitch (if applicable): Finishing Seams
If your Kenmore 12-Stitch machine includes an overlock stitch (sometimes labeled as a stretch stitch), it’s a fantastic tool for professionally finishing raw edges and preventing fabric fraying. This stitch creates a neat, secure seam allowance, especially beneficial for knit or stretchy fabrics.
Consult your manual to confirm if your model features this stitch and to identify the correct presser foot. Typically, an overlock foot is recommended for optimal results. Adjust the stitch width according to the fabric type – wider for heavier fabrics, narrower for lighter ones.
Align the fabric edges together and slowly lower the presser foot. Begin sewing, guiding the fabric evenly. The overlock stitch will simultaneously sew and overcast the edge, creating a clean finish. Today, February 1st, 2026, remember to maintain a consistent sewing speed.
For curved seams, gently guide the fabric, allowing the machine to navigate the curves. Practice on scrap fabric to become comfortable with the stitch and adjust settings as needed. A properly finished seam enhances the durability and appearance of your garment.
Regularly check the manual for specific overlock stitch variations and troubleshooting tips related to your Kenmore model.
Adjusting Stitch Length and Width
Mastering stitch length and width adjustments on your Kenmore 12-Stitch machine unlocks a world of sewing possibilities. These dials, clearly marked on your machine, control the size of each stitch and the distance between stitch columns, respectively.
Shorter stitch lengths (lower numbers) are ideal for delicate fabrics or areas requiring extra strength, like curves or gathers. Longer stitch lengths (higher numbers) are suited for basting, gathering, or sewing thicker materials. Always test on scrap fabric first!
Stitch width controls the zigzag pattern’s breadth. A narrower width creates a straight stitch, while increasing the width produces a wider zigzag; This is crucial for decorative stitching, stretch stitches, or reinforcing seams. Remember today’s date: 02/01/2026.
Refer to your manual for recommended settings for different fabrics and stitch types. Experimentation is key! Observe how changes affect the fabric’s appearance and durability. Consistent stitch length and width contribute to a professional-looking finish.
Be mindful that extreme settings can cause issues like puckering or thread breakage. Gradual adjustments are always best. Regularly consult your manual for specific guidance related to your Kenmore model.
Tension Adjustment: Achieving Balanced Stitches
Achieving balanced stitches on your Kenmore 12-Stitch machine hinges on proper tension adjustment. Incorrect tension leads to looping, puckering, or weak seams – all easily remedied with a little understanding;
The tension dial controls the force pulling the upper thread through the fabric. A higher number increases tension, while a lower number decreases it. The goal is a balanced pull between the upper and bobbin threads.
To test tension, sew a straight stitch on a double layer of your fabric. Examine the stitches: if the upper thread pulls the fabric down, decrease the upper tension. If the bobbin thread forms loops on the top, increase the upper tension; Remember today is 02/01/2026.
Always make small adjustments – a quarter turn at a time – and retest after each change. Different fabrics and thread types require varying tension settings. Your manual provides a starting point, but experimentation is vital.

Consistent tension ensures strong, even stitches. Don’t forget to re-adjust tension when changing thread or fabric types. A well-adjusted machine delivers professional-quality results and extends the life of your sewing projects.
Needle and Presser Foot Selection
Choosing the correct needle and presser foot is crucial for successful sewing with your Kenmore 12-Stitch machine. These components work together to ensure proper fabric feeding and stitch formation. Your manual details specific recommendations, but understanding the basics is key.
Needles come in various sizes and types. Universal needles work for woven fabrics, while ballpoint needles are designed for knits to prevent snagging. Denim needles handle heavier materials. The needle size corresponds to the fabric weight – finer fabrics require smaller needles.
Presser feet dictate how the fabric is guided under the needle. The standard foot is versatile for general sewing. A zipper foot allows close stitching along zippers. A buttonhole foot simplifies buttonhole creation. Today is 02/01/2026.
Always match the needle and foot to your fabric and intended stitch. Using the wrong combination can cause skipped stitches, fabric damage, or uneven results. Refer to your manual’s chart for guidance.
Regularly inspect your needle for damage and replace it when necessary. A dull or bent needle can ruin your project. Proper selection and maintenance of these components contribute significantly to the quality of your sewing.
Troubleshooting Common Issues
Even with careful operation, occasional issues can arise with your Kenmore 12-Stitch machine. This section addresses common problems and their solutions, referencing your manual for detailed guidance. Remember, safety first – always unplug the machine before attempting repairs.
Skipped stitches often indicate an incorrectly threaded machine, a dull or damaged needle, or incorrect tension. Re-thread the machine, replace the needle, and adjust the tension dial. Fabric bunching can stem from incorrect tension or the wrong presser foot.
Thread breakage frequently points to improper threading, a too-tight tension, or a low-quality thread. Ensure correct threading and loosen the tension slightly. If the bobbin thread nests, it suggests improper bobbin winding or tension imbalance.
Today is 02/01/2026. Consult your manual’s troubleshooting chart for specific error codes or symptoms. If you’re unable to resolve the issue, consider seeking professional repair. Regular maintenance, as outlined in the manual, can prevent many problems.
Don’t force any mechanism. Gentle troubleshooting and careful attention to detail will help you keep your Kenmore 12-Stitch machine running smoothly for years to come.
Maintenance and Cleaning
Regular maintenance is crucial for extending the life and performance of your Kenmore 12-Stitch sewing machine. Your manual provides a detailed schedule, but consistent cleaning is paramount. Always unplug the machine before any maintenance procedures.
Dust and lint accumulate within the machine, impacting its operation. Use the brush included with your machine to remove lint from the bobbin area, feed dogs, and around the needle plate. A small vacuum cleaner with a brush attachment can also be helpful.
Periodically oil the machine, following the lubrication points indicated in your manual. Use only sewing machine oil – other lubricants can cause damage. Wipe down the exterior with a soft, damp cloth. Avoid harsh chemicals or abrasive cleaners.
Today is 02/01/2026. Inspect the needle and replace it when it becomes dull or damaged. Clean the bobbin case regularly to ensure smooth thread flow; Proper storage, covered to protect from dust, will also contribute to longevity.
Following these simple maintenance steps, as detailed in your Kenmore 12-Stitch manual, will ensure your machine continues to deliver reliable performance for countless sewing projects.
Resources for Kenmore 12-Stitch Manuals & Support
Finding resources for your Kenmore 12-Stitch sewing machine is easier than you might think! While your original manual is the best starting point, several online resources offer assistance.
The official Sears PartsDirect website (https://www.searspartsdirect.com/) often hosts downloadable manuals for older Kenmore models. Searching by model number is key. Numerous sewing machine forums and communities exist online, where users share tips, troubleshooting advice, and even scanned manuals.
YouTube is a treasure trove of instructional videos. Search for “Kenmore 12-Stitch” to find demonstrations of threading, stitch selection, and basic maintenance. Facebook groups dedicated to vintage sewing machines can also provide valuable support.
Today is 02/01/2026. If you require replacement parts, Sears PartsDirect is a reliable source. Remember to have your machine’s model number handy when searching for manuals or parts. Don’t hesitate to reach out to experienced sewing machine technicians for more complex repairs.
Utilizing these resources will help you keep your Kenmore 12-Stitch machine running smoothly for years to come, ensuring continued enjoyment of your sewing projects.