
Honeywell TH6220D1028 Installation Manual: A Comprehensive Guide
Honeywell, founded in 1885, specializes in automation systems for industry and homes. This guide details installing the TH6220D1028, offering comfort, efficiency, and control.
Understanding the Honeywell TH6220D1028 Thermostat

The Honeywell TH6220D1028 is a programmable thermostat designed to manage your home’s heating and cooling systems efficiently. It’s a popular choice for its user-friendly interface and compatibility with various systems, including forced air, heat pump, and radiant heat. Understanding its capabilities is crucial for a smooth installation and optimal performance.
This thermostat allows for customized scheduling, enabling you to set different temperatures for different times of the day, reducing energy consumption and saving money. It offers both automatic and manual control modes, providing flexibility to suit your lifestyle. The TH6220D1028 also supports features like swing adjustment and filter change reminders, enhancing convenience and system maintenance.
Furthermore, the thermostat is designed to integrate with the Honeywell Home app, offering remote control and monitoring capabilities. This allows you to adjust settings, view energy usage, and receive alerts from anywhere with an internet connection. Its core function revolves around responsibility and informational support, anticipating customer needs from product realization.
Key Features and Specifications
The Honeywell TH6220D1028 boasts several key features, including a large, easy-to-read backlit display, programmable 7-day scheduling, and compatibility with various heating and cooling systems. It supports single-stage and multi-stage heating/cooling, alongside heat pump operation. Precise temperature control ensures consistent comfort throughout your home.
Specifications include a temperature range of 40°F to 90°F (4°C to 32°C), power requirements of 24 VAC, and the ability to operate with or without common (C) wire – though a C-wire is recommended for optimal performance and smart features. It supports non-programmable and 5-1-1 day programming schedules.
Connectivity via the Honeywell Home app allows for remote access and control. The thermostat also features filter change reminders and swing adjustment capabilities. Honeywell prioritizes intuitive, flexible innovations in indoor air quality and energy efficiency, delivering a product focused on both functionality and user experience;
Safety Precautions Before Installation
Important Safety Instructions: Before beginning the installation of your Honeywell TH6220D1028 thermostat, always disconnect power to your heating and cooling system at the breaker box. Failure to do so could result in electrical shock or damage to your equipment. This installation should be performed by a qualified technician if you are unfamiliar with low-voltage wiring.
Carefully read all instructions and warnings included in this manual. Honeywell emphasizes responsibility and informational support, ensuring a safe and successful installation. Do not install the thermostat in a location exposed to direct sunlight, drafts, or extreme temperatures, as this can affect its accuracy.
Ensure the mounting surface is clean and dry. Avoid touching the thermostat’s internal components. If you encounter any difficulties or are unsure about any step, consult a professional. Prioritizing safety ensures the longevity and reliable operation of your new thermostat and your home’s systems.
Installation Process: Step-by-Step
This process involves removing your old thermostat, carefully labeling wires, and connecting them to the TH6220D1028. Power up, configure settings, and enjoy smart home control!
Step 1: Removing Your Old Thermostat
Before you begin, it’s crucial to switch off the power to your heating and cooling system at the breaker box. This prevents electrical shock and ensures a safe installation process. Carefully remove the cover of your existing thermostat to expose the wiring terminals.
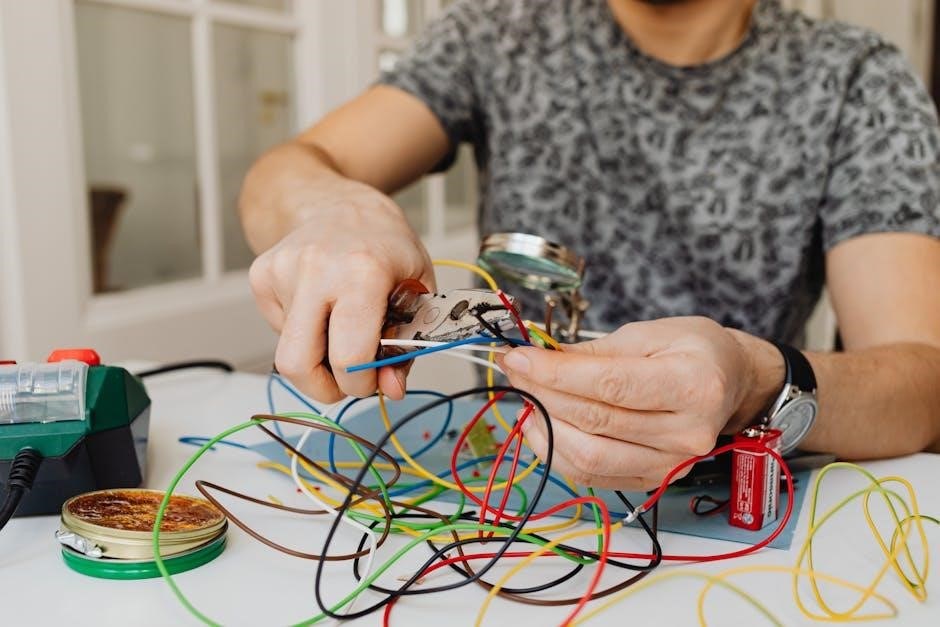
Take a clear photograph of the existing wiring configuration. This photo will serve as a vital reference during the connection phase with the Honeywell TH6220D1028. Gently disconnect each wire from the old thermostat terminals, avoiding any accidental shorts.
Handle the wires with care, as they are often fragile. As you disconnect each wire, use small pieces of tape to label them according to their corresponding terminals on the old thermostat. Accurate labeling is paramount for a successful and trouble-free installation. Once all wires are disconnected and labeled, you can safely remove the old thermostat base from the wall.
Step 2: Identifying and Labeling Wires
Accurate wire identification is the cornerstone of a successful thermostat installation. Refer to the photograph taken during the removal of your old thermostat. Common wire colors and their functions include Red (Power ‒ 24V), White (Heat), Yellow (Cool), Green (Fan), and Blue (Common). However, wiring configurations can vary.
If your wires aren’t color-coded, rely solely on the labels you applied during disconnection. Double-check each wire against your photograph and the old thermostat’s terminal markings. Use the provided wire labels included with the Honeywell TH6220D1028, or create your own using masking tape and a permanent marker.
Clearly mark each wire with its corresponding terminal designation (e.g., R, W, Y, G, C). Ensure the labels are securely attached and easily readable. This meticulous labeling process will prevent errors during the connection stage and ensure your new thermostat functions correctly.
Step 3: Connecting the Wires to the TH6220D1028
With wires labeled, carefully connect them to the corresponding terminals on the Honeywell TH6220D1028 backplate. Refer to the wiring diagram included in this manual and ensure a secure connection for each wire. Gently insert each wire into the appropriately labeled terminal, ensuring no bare wire is exposed.
Confirm each connection matches your previous labeling and the wiring diagram. A loose connection can cause system malfunctions. If you have a ‘C’ wire (common wire), connect it to the ‘C’ terminal; this is crucial for consistent power.
Double-check all connections before proceeding. A slight tug on each wire confirms a secure fit. If any wire feels loose, gently re-insert it. Incorrect wiring can damage your HVAC system, so accuracy is paramount. Once verified, proceed to the next step with confidence.
Powering Up and Initial Configuration
After wiring, install batteries or connect to power. Set the correct date and time, then configure your system type – heat, cool, or heat pump – for optimal function.
Step 4: Installing Batteries or Connecting to Power
The Honeywell TH6220D1028 thermostat can be powered in two ways: via batteries or a hardwired connection to your HVAC system’s power source. If using batteries, typically two AA alkaline batteries are required. Ensure correct polarity when inserting them into the battery compartment, usually located behind a sliding cover on the thermostat.
For hardwired installations, verify that the power to your HVAC system is completely turned off at the breaker box before proceeding. This is a crucial safety precaution. The thermostat will draw power from the ‘C’ wire (common wire) if available. If a ‘C’ wire isn’t present, a ‘C’ wire adapter may be necessary, sold separately.
Once batteries are installed or the wiring is confirmed, the thermostat’s display should illuminate, indicating it’s receiving power. If the display remains blank, double-check the battery installation or wiring connections. A stable power source is essential for accurate operation and programming.
Step 5: Setting the Date and Time
Accurate date and time settings are fundamental for proper scheduling and operation of your Honeywell TH6220D1028 thermostat. Upon initial power-up, the thermostat will likely prompt you to set the current date and time. Navigate through the thermostat’s menu using the up and down arrow buttons, or the touchscreen if your model features one.
Typically, you’ll first set the year, then the month, and finally the day. After setting the date, proceed to set the time, starting with the hour and then the minutes. Ensure you select the correct AM or PM designation. Some models may also allow you to choose a 12-hour or 24-hour time format.
Confirm each setting by pressing the ‘Set’ or ‘Enter’ button. Incorrect date and time settings can lead to scheduling errors, so double-check your entries. Refer to the thermostat’s display for clear instructions during this process. A correctly configured time ensures your comfort settings activate when intended.
Step 6: Configuring System Type (Heat, Cool, Heat Pump)
Proper system type configuration is crucial for the Honeywell TH6220D1028 to function correctly with your home’s heating and cooling equipment. The thermostat needs to know whether it’s controlling a conventional heating and cooling system, or a heat pump system. Access the system configuration menu through the thermostat’s settings.
You’ll typically be presented with options like ‘Heat Only,’ ‘Cool Only,’ ‘Heat Pump,’ or ‘Conventional.’ Select the option that accurately reflects your home’s setup. If you have a heat pump, you may also need to configure settings related to auxiliary heat or emergency heat. Incorrect configuration can result in inefficient operation or the system not functioning at all.
Consult your HVAC system’s documentation if you’re unsure about your system type. After selecting the correct type, save the changes. The thermostat will then adjust its operation to match your chosen configuration, ensuring optimal performance and comfort.

Advanced Settings and Programming
Honeywell Home offers intuitive, flexible innovations for comfort and energy efficiency. Explore scheduling, smart features, and the app for personalized control of your thermostat.
Step 7: Programming a Schedule
Creating a personalized heating and cooling schedule is a key benefit of the Honeywell TH6220D1028. This allows you to optimize energy usage and maintain comfort levels throughout the day, automatically adjusting temperatures based on your routine. The thermostat supports multiple daily periods – typically Wake, Leave, Return, and Sleep – each with a unique temperature setting.
To program a schedule, navigate to the ‘Schedule’ option within the thermostat’s menu. You’ll be prompted to set the time and temperature for each period of the day. Consider your daily activities: lower temperatures while you’re away at work or asleep, and increase them before you wake up or return home.
The Honeywell Home app provides a more visual and user-friendly interface for schedule creation and modification. You can easily drag and drop periods, adjust temperatures, and even create different schedules for weekdays and weekends. Remember to save your changes after each adjustment to ensure the schedule is active. Consistent scheduling maximizes energy savings and ensures a comfortable home environment.
Step 8: Utilizing Smart Features & Honeywell Home App
The Honeywell TH6220D1028 unlocks enhanced control and convenience when paired with the Honeywell Home app. This app, available for iOS and Android, allows remote access to your thermostat from anywhere with an internet connection. Adjust temperatures, view energy usage reports, and receive alerts – all from your smartphone or tablet.
Beyond remote control, the app facilitates geofencing, automatically adjusting the temperature when you leave or approach your home. Smart features also include integration with voice assistants like Amazon Alexa and Google Assistant, enabling voice command control. Discover intuitive, flexible innovations for comfort and energy efficiency.
The app simplifies schedule management, offering a visual interface for creating and modifying heating and cooling programs. Regular app updates ensure access to the latest features and security enhancements. Explore Honeywell Home’s smart products and solutions for a truly connected home experience, automating comfort, air, and energy use.
Step 9: Understanding Error Codes and Troubleshooting
The Honeywell TH6220D1028 thermostat displays error codes to indicate potential issues. Common codes relate to wiring problems, sensor failures, or communication errors with the system. Refer to the complete error code list in the appendix of this manual for detailed explanations and recommended solutions.
Troubleshooting often begins with verifying the power supply – ensure batteries are fresh or the C-wire connection is secure. Check wiring connections against your initial labeling to identify any discrepancies. If the thermostat fails to connect to the Honeywell Home app, confirm your Wi-Fi network is functioning correctly.
Honeywell emphasizes responsibility and informational support. For persistent issues, contacting Honeywell Technical Support (Russia: 7 8222 270278, tverhoneywell-ec.ru) is recommended. Remember, Honeywell prioritizes customer support from product realization, anticipating needs and providing assistance.

Honeywell Company Information & Support
Honeywell, established in 1885, delivers industrial and residential automation. Support in Russia is available via phone (7 8222 270278) and email (tverhoneywell-ec.ru).
Step 10: Honeywell History and Business Divisions (2025 Split)
Honeywell’s rich history began in 1885, evolving into a diversified technology leader. A significant turning point occurred in 2025 with the strategic decision to separate into three independent, publicly traded companies. This restructuring aimed to unlock greater value and focus for each business.
The three resulting entities are Honeywell Automation, concentrating on building technologies and industrial automation; Honeywell Aerospace, dedicated to the aviation and defense sectors; and Solstice Advanced Materials, specializing in innovative materials science. This split followed Honeywell’s earlier partnership with Raytheon and the subsequent integration of Datamatic.
Prior to the split, Honeywell served as a key contractor for NASA, supplying crucial components for space missions since 1964. The company’s commitment to responsibility and customer support remains central to its operations, even with the new divisional structure. This reorganization reflects Honeywell’s adaptability and forward-thinking approach to the evolving technological landscape.
Step 11: Contacting Honeywell Technical Support (Russia)
For technical assistance with your Honeywell TH6220D1028 thermostat in Russia, dedicated support is available to ensure a smooth installation and operation experience. Honeywell prioritizes providing accessible and efficient support channels for its customers throughout the region.
You can reach the Honeywell technical support team in Russia from 9:00 AM to 6:00 PM Moscow time. The telephone number for assistance is +7 8222 270278. Alternatively, for email support, you can contact them at tverhoneywell-ec.ru. A secondary email address is also available: tverhoneywell-ec.ru.
Honeywell emphasizes informational support and proactive customer care, aiming to anticipate and address potential issues before they arise. Their team is equipped to handle inquiries related to installation, programming, troubleshooting, and any error codes encountered during use. Prompt and reliable assistance is a cornerstone of Honeywell’s commitment to customer satisfaction in Russia.
Step 12: Purchasing Honeywell Products in Russia
Acquiring Honeywell products, including the TH6220D1028 thermostat, in Russia is streamlined through various official channels, ensuring authenticity and reliable service. Honeywell offers a diverse range of both household and industrial automation solutions, encompassing gas, electricity, water, and heat metering devices, alongside control and protection systems.
For convenient purchasing options, visit the official Honeywell website in Russia. This platform provides access to the complete product catalog, detailed specifications, and secure online ordering with delivery services available throughout the country. You can find competitive pricing and benefit from direct support from Honeywell.
Honeywell’s commitment extends beyond product delivery; they prioritize responsibility and comprehensive informational support. They strive to understand customer needs from the outset, anticipating requirements and providing solutions. Purchasing directly ensures access to warranties, genuine parts, and the latest product innovations, solidifying Honeywell’s position as a trusted provider in the Russian market.