
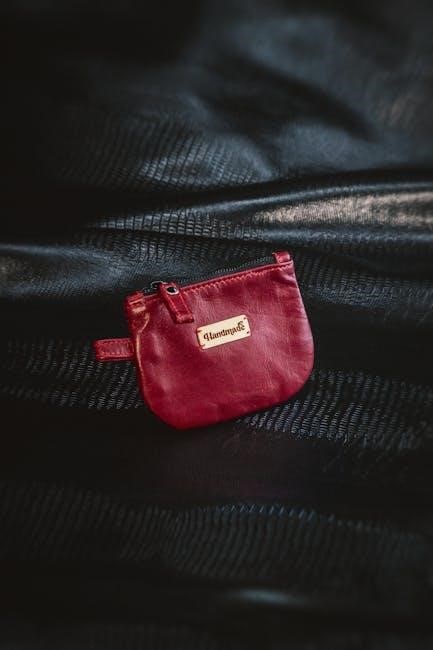
Lined zippered pouches are incredibly versatile projects, perfect for beginners seeking a rewarding sewing experience! These pouches offer practical storage and a delightful handmade touch.
Creating your own allows for complete customization – fabric choices, size adjustments, and unique zipper tab designs are all within your control, fostering creativity.
What is a Lined Zippered Pouch?
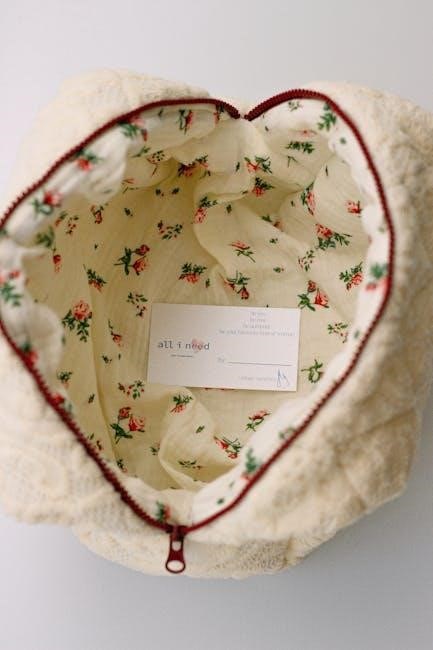
A lined zippered pouch is a fabric container secured with a zipper closure, featuring an inner lining for a clean finish and added durability. Unlike unlined pouches, the lining conceals raw edges, providing a more professional and polished look.
These pouches come in various sizes, from small coin purses to larger pouches suitable for cosmetics or stationery. The construction typically involves sewing the outer fabric and lining separately, then joining them together with the zipper sandwiched in between.
As Charlotte Kan points out, zippered pouches are a “simple” project, ideal for beginners. Melanie Ham’s tutorials demonstrate how to avoid “raw edges” with this construction method, making it a great starting point for learning zipper application!
Why Make Your Own?
Making your own lined zippered pouches unlocks a world of creative possibilities! You gain complete control over fabric selection, allowing you to perfectly match your style or create personalized gifts. Scrap fabric becomes treasure, minimizing waste and maximizing resourcefulness – a perfect beginner project!
Beyond aesthetics, handmade pouches offer superior quality and durability compared to mass-produced alternatives. You can customize the size to fit specific needs, as demonstrated by the various dimensions available in online tutorials.
Furthermore, learning to sew these pouches builds valuable skills, boosting confidence and opening doors to more complex sewing projects. As I Can Sew This highlights, it’s a “simple tutorial” that’s “perfect for beginners”!

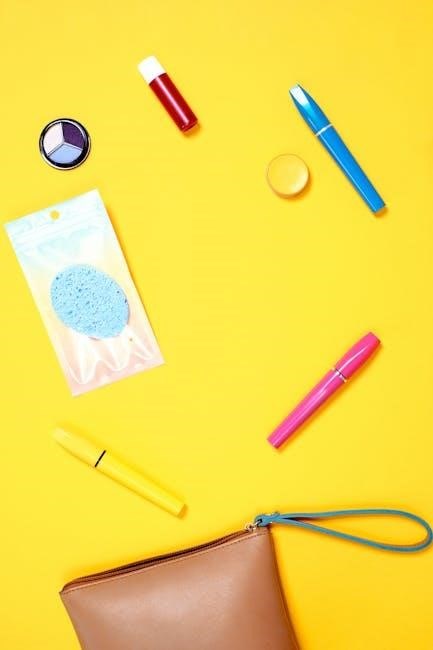
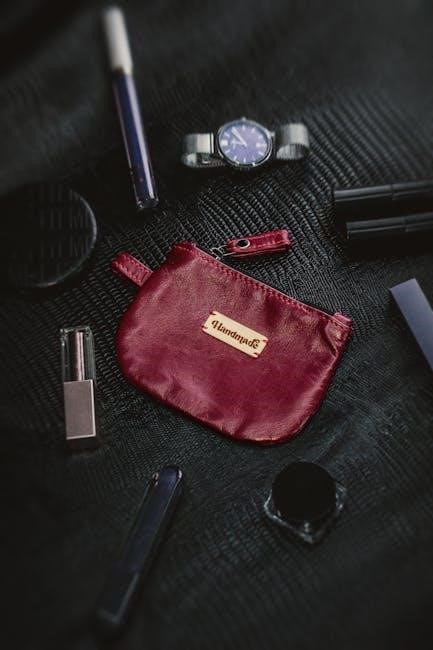
Materials Needed

To begin, gather fabric scraps, a zipper (9-inch is common), scissors, a sewing machine, thread, pins, and a ruler for precise measurements.
Fabric Choices for Pouches
Selecting the right fabric is crucial for both aesthetics and durability. Cotton fabrics are excellent for beginners due to their ease of handling and wide availability, offering countless prints and colors.
For a more structured pouch, consider using canvas, denim, or quilting cotton. These heavier-weight fabrics provide stability and resilience. Linen offers a beautiful texture but can be slightly more challenging to sew.
Don’t be afraid to mix and match fabrics for the outer layer and lining! Quilting cottons are popular for linings, providing a smooth interior. Consider pre-washing all fabrics to prevent shrinkage after the pouch is completed, ensuring a lasting, professional finish.
Zipper Selection (Size & Type)
Choosing the correct zipper significantly impacts the pouch’s functionality and appearance. Standard zippers range in size, with 9-inch zippers being a common choice for small to medium pouches. Consider a 10.5-inch zipper for larger dimensions.
Nylon coil zippers are beginner-friendly, offering flexibility and ease of installation. Metal zippers provide a more robust and classic look, but can be trickier to sew. Separating zippers allow for a full opening, ideal for larger pouches or those intended for specific items.
Ensure the zipper length corresponds to the desired pouch opening. A slightly longer zipper can be trimmed, while a shorter one may require adjustments.
Essential Sewing Supplies
To embark on your zippered pouch journey, gather these essential tools! A sewing machine is highly recommended, though hand-sewing is possible for patient crafters. Sharp fabric scissors are crucial for precise cutting of both outer and lining fabrics.
You’ll need pins to hold fabric layers together, a seam ripper for correcting mistakes, and a measuring tape or ruler for accurate dimensions. A fabric marker or pencil helps transfer pattern pieces. Don’t forget thread that matches your chosen fabrics!
An iron and ironing board are vital for pressing seams, creating a professional finish. A zipper foot for your sewing machine simplifies zipper attachment.
Step-by-Step Tutorial: Basic Lined Zipper Pouch
Let’s begin! This tutorial guides you through creating a classic lined zippered pouch, perfect for beginners. Follow these steps for a satisfying sewing project.
Cutting the Fabric Pieces (Outer & Lining)
Precise cutting is key! For a standard pouch, begin by cutting your outer fabric and lining fabric to the same dimensions – typically 10.5 x 6.5 inches, as suggested by some sources. Remember to account for seam allowances, usually ¼ inch.
You’ll need two pieces each of the outer fabric and lining fabric. The zipper length dictates some dimensions; a 9-inch zipper requires fabric pieces slightly larger, around 10.5 inches, to allow for proper attachment.
Carefully measure and cut using a rotary cutter or sharp scissors for clean edges. Accuracy at this stage ensures a professional finish. Double-check your measurements before cutting to avoid wasted fabric!
Preparing the Zipper
Before attaching the zipper, a crucial step is to position the zipper pull! Slide the zipper pull to the middle of the zipper teeth. This provides optimal access during the sewing process and ensures a balanced pouch.
Some tutorials recommend slightly opening the zipper before attaching it to the fabric. This allows for easier maneuvering and prevents accidental closures during sewing. Ensure your zipper is the correct length for your desired pouch size – a 9-inch zipper is common.
Inspect the zipper for any defects or sticky teeth. A smooth-operating zipper is essential for a finished product you’ll love!
Attaching the Zipper to the Fabric (First Side)
Place the zipper face down on the right side of your outer fabric piece. Align the zipper tape with the fabric edge, ensuring even distribution. Pin securely along both sides of the zipper tape to hold it in place.
Using a zipper foot on your sewing machine is highly recommended for precision. Stitch close to the zipper teeth, typically ¼ inch from the edge. Backstitch at the beginning and end to secure the seam.
Repeat this process with the corresponding lining fabric piece, attaching it to the opposite side of the zipper. Remember to use the same seam allowance for consistency!
Attaching the Zipper to the Fabric (Second Side)
Now, take the remaining outer fabric piece and place it right side down onto the exposed zipper tape. Pin securely, mirroring the placement from the first side. Again, utilize a zipper foot for accurate stitching.
Stitch along both sides of the zipper tape, maintaining a consistent ¼ inch seam allowance. Backstitch at both ends for durability. Repeat this process with the remaining lining fabric piece, attaching it to the final side of the zipper.
Ensure both sides are aligned and the zipper pull is centered before completing the stitching. This step establishes the foundational structure of your pouch!
Sewing the Pouch Sides and Bottom
With right sides facing, carefully pin the outer fabric pieces together, leaving the top open where the zipper is. Ensure the zipper is fully open to allow for turning later. Stitch along both sides and the bottom with a ¼ inch seam allowance, backstitching at the beginning and end for reinforcement.
Repeat this process with the lining pieces, but leave a 4-6 inch opening in the bottom seam of the lining. This opening is crucial for turning the pouch right side out. Clip the corners of both the outer fabric and lining to reduce bulk and create sharper corners.

Adding Lining to the Pouch
Carefully insert the outer pouch into the lining, right sides together. Align all edges, ensuring a smooth fit, and prepare for the final sewing steps!
Attaching the Lining to the Pouch
With the outer fabric and lining wrong sides together, carefully pin around the entire opening of the pouch. This crucial step ensures a neat and secure attachment. Leave a small opening (around 2-3 inches) along the bottom seam of the lining.
Using a ¼ inch seam allowance, stitch around the entire perimeter, remembering to backstitch at the beginning and end for durability. This secures the lining to the outer pouch, creating the finished shape.
The unstitched opening in the lining is essential for turning the pouch right side out. Once turned, hand-stitch this opening closed with a blind stitch for a professional, invisible finish. This completes the lining attachment process!
Turning the Pouch Right Side Out
Gently reach inside the opening you left in the lining and carefully pull the entire pouch through. This can take a little patience, especially around the corners, but avoid stretching the fabric or damaging the zipper.

Use a point turner or a blunt tool (like a chopstick!) to gently push out the corners, creating a crisp, defined shape. This step is vital for achieving a professional-looking finish. Take your time and be careful not to poke through the fabric.
Once the corners are fully extended, press the pouch lightly with an iron on a low setting. This helps to smooth out any wrinkles and gives the pouch a polished appearance. Now it’s ready for the finishing touches!
Finishing Touches
Clipping corners reduces bulk, while topstitching adds durability and a professional aesthetic. These final steps elevate your handmade zippered pouch!
Clipping Corners for a Clean Finish
After turning your pouch right side out, you’ll notice some bulkiness in the corners. This is perfectly normal, but we want a crisp, clean finish! Clipping the corners carefully removes excess fabric, allowing for sharper points. Use sharp scissors to snip diagonally across each corner, being careful not to cut through the stitching.
Think of it as creating a small triangle removed from each corner. The closer you clip to the stitching (without cutting it!), the more defined your corners will be. This seemingly small step makes a huge difference in the overall appearance of your finished pouch, preventing a puffy or rounded look. It’s a crucial detail for a professional-looking result!
Topstitching for Durability and Appearance
Topstitching isn’t just about aesthetics; it significantly enhances the pouch’s durability! Sewing a line of stitching close to the edges reinforces the seams, preventing fraying and extending the life of your handmade item. Use a slightly longer stitch length than you did for the main construction – around 3mm is ideal.
Topstitching also adds a polished, professional finish. Stitch around the entire perimeter of the pouch, maintaining a consistent distance from the edge (typically 1/8” to 1/4”). Consider using a contrasting thread color for a bolder look, or match it for a more subtle effect. This final detail elevates your pouch from simply functional to beautifully crafted!
Zipper Tab Techniques
Zipper tabs add a personalized touch! Easily create fabric tabs for better grip and style, attaching them securely to the zipper pull for enhanced functionality.
Creating Fabric Zipper Tabs
Fabric zipper tabs are a simple addition that elevates your pouch! Begin by cutting small rectangles of your chosen fabric – approximately 2 inches by 4 inches works well for a standard zipper. Fold each rectangle in half lengthwise, with right sides facing, and sew along the long edge, leaving a small opening for turning.
Carefully turn the fabric tube right side out, pressing it flat with the seam centered. Topstitch along all four edges to create a neat and durable tab. Repeat this process to create a second tab. The fabric choice allows for coordinating or contrasting designs, adding a unique flair to your finished pouch. These tabs provide a more substantial grip on the zipper pull, making it easier to open and close.
Attaching Zipper Tabs to the Zipper
Attaching zipper tabs is a straightforward process. Slide a fabric tab onto the zipper pull, ensuring the right side of the tab faces outwards. Gently fold the tab’s raw edge over the zipper pull and secure it with a few stitches, either by hand or using your sewing machine.
Reinforce the stitching to ensure the tab is firmly attached and won’t easily come loose with use. Repeat this process for the other zipper tab on the opposite side of the zipper. These tabs not only enhance the pouch’s aesthetic but also provide a better grip for opening and closing, making the zipper more functional. A secure attachment is key for durability!
Pouch Size Variations
Pouch sizes are easily adjusted! Common dimensions include small (9” zipper, 10.5”x6.5” fabric), medium, and large, catering to diverse storage needs and preferences.
Small Zipper Pouch Dimensions
For a delightful small zippered pouch, consider these dimensions as a starting point. A 9-inch zipper is generally recommended, measuring approximately 10.5 inches from end to end when fully opened.
The outer fabric and lining pieces should be cut to 10.5 inches in length and 6.5 inches in width. These measurements allow for sufficient seam allowance and a neatly finished pouch. This size is ideal for holding small essentials like coins, keys, or makeup.
Remember that these are guidelines; feel free to adjust slightly based on your desired aesthetic and the specific items you intend to store within the pouch. Experimentation is encouraged!
Medium Zipper Pouch Dimensions
To craft a practical medium-sized zippered pouch, a 12-inch zipper is a good choice, extending to roughly 14.5 inches when unzipped. This provides ample opening for accessing the pouch’s contents.
Cut your outer fabric and lining pieces to 14.5 inches in length and 8.5 inches in width. These dimensions accommodate a wider range of items, such as pens, small toiletries, or crafting supplies. The extra width offers a more spacious interior.
Adjustments can be made to personalize the size, but maintaining proportional dimensions ensures a well-constructed and functional pouch. This size strikes a balance between portability and capacity.
Large Zipper Pouch Dimensions
For a generously sized large zippered pouch, begin with a 16-inch zipper, extending to approximately 18.5 inches when fully opened. This larger zipper allows for easy access to a greater volume of contents.
Cut your outer fabric and lining pieces to 18.5 inches in length and 10.5 inches in width. These dimensions are ideal for storing larger items like makeup bags, electronic accessories, or even small travel essentials. The increased size provides substantial storage space.
Remember to maintain proportional dimensions for a structurally sound pouch. A larger pouch benefits from reinforced stitching, especially at stress points, to ensure durability.
Troubleshooting Common Issues
Zipper malfunctions or uneven seams can occur! Gently coax a stuck zipper with pliers, and carefully re-sew uneven seams for a polished, professional finish.
Zipper Gets Stuck
A stuck zipper is a common frustration, but often easily resolved! First, don’t force it, as this can worsen the problem. Inspect the zipper teeth for any trapped fabric – carefully remove it with tweezers or a seam ripper.
If fabric isn’t the culprit, a little lubrication can work wonders. Rub a graphite pencil lead along the zipper teeth, or apply a tiny amount of zipper lubricant or even clear lip balm.
Gently work the zipper pull back and forth. If it remains stubborn, carefully use pliers to slightly widen the zipper pull’s opening, but be extremely cautious not to damage it. Remember, patience is key!
Prevention is also helpful: ensure your fabric isn’t too thick for the zipper size, and sew slowly and accurately around the zipper.
Uneven Seams
Uneven seams can detract from a beautifully made pouch, but are often correctable! The most common cause is inconsistent seam allowance. Always use a ¼ inch seam allowance and a seam guide while sewing, ensuring consistent distance from the fabric edge.
Pressing seams open or to one side after sewing is crucial. This sets the stitches and reveals any discrepancies. If seams are slightly off, carefully use a seam ripper to adjust and re-sew.
Backstitching at the beginning and end of each seam secures the stitches and prevents unraveling, contributing to a neater finish. Practice maintaining a consistent sewing speed for even results.
Don’t rush! Slow and steady sewing yields more accurate seams and a professional-looking pouch.
Resources and Further Learning
Expand your skills! Explore tutorials from Melanie Ham, Charlotte Kan, and I Can Sew This for detailed guidance and free patterns online.
Online Tutorials (Melanie Ham, Charlotte Kan, I Can Sew This)
Melanie Ham offers a particularly beginner-friendly tutorial for a zippered box pouch, praised for its clear instructions and avoidance of raw edges. Many find her approach less intimidating, even with limited sewing machine experience.
Charlotte Kan emphasizes starting simple with zippers, highlighting that pouches require minimal materials and provide a satisfying first success. Her step-by-step video guides are excellent for visual learners.
I Can Sew This provides a comprehensive guide to creating a lined zipper pouch with zipper tabs, covering all essential steps in a straightforward manner. These resources collectively offer diverse approaches to mastering this versatile sewing project, catering to various skill levels and preferences.
Free Patterns Available Online
Numerous websites offer free patterns to kickstart your lined zippered pouch journey! Many tutorials, like the one from “How to Sew A Zipper Pouch,” include a downloadable free pattern, simplifying the cutting process for beginners.
These patterns often come with detailed instructions and diagrams, guiding you through each step. Searching online for “free zipper pouch pattern” yields a wealth of options, ranging from simple rectangular pouches to more complex designs.
Utilizing a free pattern eliminates the need for initial investment and allows you to experiment with different sizes and styles before committing to more elaborate projects. Don’t hesitate to explore and find a pattern that suits your skill level and desired aesthetic!