
Allstar MVP Garage Door Opener Manual: A Comprehensive Guide
This guide provides detailed instructions for installing, programming, and maintaining your Allstar MVP garage door opener, ensuring safe and reliable operation.

The Allstar MVP garage door opener is a residential vehicular door operator designed for reliable performance and ease of use. This manual serves as a comprehensive resource, covering installation, safety precautions, and operational guidelines. It details how to connect the door brackets and program remote controls.
Understanding this manual is crucial for maximizing the lifespan of your opener and ensuring safe operation. Compatibility with ismartgate allows for smart home integration, while Digi-Code radio controls offer convenient remote access. Always adhere to ANSI/UL 325 compliance standards.
Safety Precautions and Warnings
WARNING: This garage door opener presents potential mechanical hazards that could cause damage to the door, opener, or related equipment. Always disconnect power before servicing. Never allow children to operate the opener or play near the door. Regularly inspect the safety sensors to ensure proper function.
Adhere strictly to ANSI/UL 325 compliance guidelines. Improper installation or maintenance can lead to serious injury. This manual provides critical instructions to mitigate risks and ensure safe operation of your Allstar MVP system.
Understanding the Components
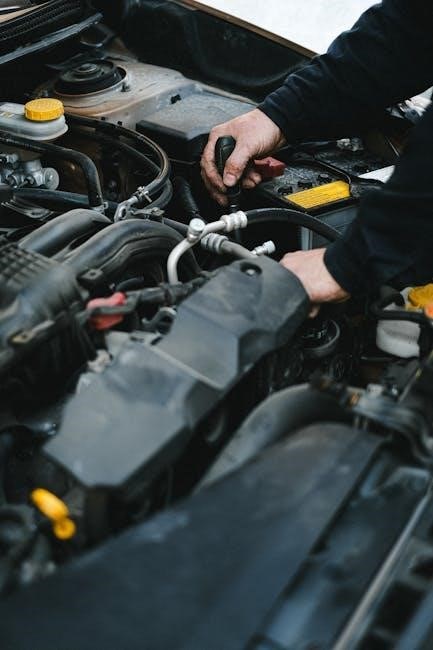
The Allstar MVP system comprises several key parts working in unison. These include the opener unit itself, the door brackets connecting to your garage door, and the remote control transmitters for convenient operation. Crucially, the safety sensors prevent the door from closing on obstructions.
Digi-Code radio controls offer secure access. Familiarizing yourself with each component, as detailed in this manual, is essential for proper installation, troubleshooting, and maintaining optimal performance of your garage door opener.
Identifying the Key Parts of the Opener System
The Allstar MVP opener system features a robust motor unit, responsible for lifting and lowering the door. Door brackets securely attach the opener to the garage door panels. A trolley connects these, transferring the motor’s power. The rail guides the trolley’s movement, ensuring smooth operation.
Safety sensors are vital, preventing accidental closures. Finally, the receiver within the unit interprets signals from your remote control, enabling convenient access. Understanding each part aids in effective maintenance and repair.
Remote Control Overview
Your Allstar MVP remote controls are designed for convenient garage door and gate operation. These transmitters utilize a vast code selection – 19683 possibilities – minimizing interference. They offer wireless control from your vehicle or elsewhere within range. The Digi-Code technology ensures secure access, preventing unauthorized operation.
Proper battery maintenance is crucial for reliable performance. Familiarize yourself with the button functions for single-door or multi-door control, enhancing your daily convenience and security.

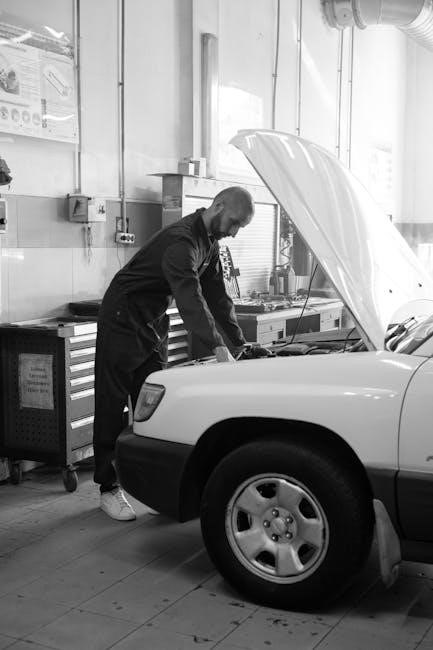
Installation Guide
Proper installation of your Allstar MVP garage door opener is critical for safe and efficient operation. This section details the mounting process of the opener unit itself, ensuring secure attachment to your garage ceiling. It also covers connecting the necessary door brackets, establishing a firm link between the opener and your garage door.
Always refer to the complete manual for detailed diagrams and safety precautions before beginning installation. Incorrect installation can lead to damage or injury.
Mounting the Opener Unit
Securely mounting the Allstar MVP opener unit is paramount for stable operation. Begin by identifying suitable ceiling joists capable of supporting the unit’s weight. Utilize the provided mounting brackets, ensuring they are firmly attached to the joists with appropriate hardware – lag screws are typically recommended.
Double-check all connections for tightness and stability before proceeding. A wobbly or insecurely mounted unit can cause excessive noise and potential damage.
Connecting the Door Brackets
Properly attaching the door brackets is crucial for smooth and reliable door movement. Securely fasten the curved door brackets to the door itself, using bolts and nuts of the correct size and strength. Ensure the brackets are aligned and level on both sides of the door.
Then, connect the opener arm to these brackets, verifying a solid connection. Incorrect bracket installation can lead to operational issues and potential safety hazards.
Programming the Remote Controls
Your Allstar MVP opener utilizes Digi-Code radio controls for convenient remote access. Programming is straightforward, allowing you to easily operate your garage door or gate from your vehicle. The transmitter offers a vast selection – 19683 possible combinations – minimizing interference.

Follow the specific steps outlined in the manual to synchronize the remote with the opener unit, ensuring a secure and functional connection for years of reliable use.
Initial Remote Programming Steps
To begin, locate the “Learn” button on your Allstar MVP opener unit – its position may vary, so consult your full manual. Press and release this button; a nearby LED indicator will illuminate. Within thirty seconds, press and hold the desired button on your new remote control until the garage door opener activates.
Successful programming is indicated by the door operating, confirming the remote is now synchronized with the system.
Adding Additional Remotes
To add further remotes to your Allstar MVP system, repeat the initial programming process. First, press and release the “Learn” button on the garage door opener unit, initiating the programming mode. Then, within the thirty-second timeframe, press and hold the button on the new remote until the door operates.
Each remote requires individual programming; the system supports a vast number of possible combinations, offering flexibility and security.
Troubleshooting Common Issues
Encountering problems with your Allstar MVP opener? This section addresses frequent concerns. If the door doesn’t open or close, check the power supply, safety sensors, and remote batteries. Remote malfunctions often stem from low batteries or programming issues – re-programming may be necessary.
Be mindful of potential mechanical hazards causing damage to the door or opener; always prioritize safety during troubleshooting and refer to the full manual for detailed guidance.
Door Not Opening or Closing
If your Allstar MVP garage door fails to open or close, first verify the power supply to the opener unit. Inspect the safety sensors to ensure they are aligned and free from obstructions – a misaligned sensor will prevent operation. Check the remote control batteries and attempt operation using the wall-mounted button.
A mechanical hazard could exist; carefully inspect the door’s travel for binding or damage before further troubleshooting. Consult the full manual for detailed steps.
Remote Control Malfunctions
Experiencing issues with your Allstar MVP remote? Begin by replacing the battery, ensuring proper contact. If the problem persists, re-program the remote following the instructions in the manual – sometimes the code becomes corrupted. Verify that the remote is compatible with your specific opener model.
Digi-Code radio controls offer numerous possible codes, but interference can occur. Refer to the manual for detailed troubleshooting steps and potential solutions.
Maintenance and Lubrication
Regular maintenance extends the life of your Allstar MVP garage door opener. Implement a consistent inspection checklist, examining springs, cables, rollers, and the track for wear or damage. Lubricate moving parts – rollers, hinges, and the chain or belt drive – with a silicone-based lubricant.
Avoid using grease, as it attracts dirt. Proper lubrication ensures smooth, quiet operation and prevents premature component failure, maintaining safety and performance.

Regular Inspection Checklist
Conduct monthly inspections of your Allstar MVP opener. Visually check the door’s balance by manually lifting it halfway – it should remain stationary. Examine springs, cables, rollers, and hinges for signs of wear, rust, or damage. Inspect the track for bends or obstructions.
Verify safety sensors are aligned and unobstructed. Test the opener’s operation with the remote and wall button. Address any issues promptly to ensure safe and reliable performance.
Lubricating Moving Parts
Regular lubrication is crucial for smooth Allstar MVP operation. Apply a lithium-based grease to the door’s hinges, rollers, and springs – avoid using oil-based lubricants. Lubricate the opener’s chain or belt drive, following the manufacturer’s recommendations.
Ensure the lubricant doesn’t attract dirt. Wipe away any excess. Proper lubrication reduces friction, extends component life, and minimizes noise, contributing to a longer-lasting, efficient garage door system.

Adjusting Travel Limits
Proper travel limit adjustments are vital for safe and efficient Allstar MVP operation. These settings define how far the door opens and closes. Incorrect limits can cause the door to reverse prematurely or not fully close. Consult the manual for specific adjustment procedures, typically involving screws on the opener unit.
Carefully adjust the up and down travel limits, testing after each small change to ensure smooth, complete movement without strain. Prioritize safety during this process.

Up Travel Adjustment
The up travel adjustment controls how high the garage door opens. Locate the designated up travel adjustment screw on the Allstar MVP opener unit – the manual provides a clear diagram. Turning this screw clockwise typically increases the opening height, while counterclockwise decreases it.
Make small adjustments and test the door’s full range of motion after each turn. Ensure the door doesn’t hit the ceiling or experience excessive strain. Precise adjustment prevents operational issues.
Down Travel Adjustment
The down travel adjustment determines how far the garage door descends before stopping. Find the down travel adjustment screw on your Allstar MVP opener; the manual illustrates its location. Rotating this screw clockwise generally increases the closing distance, while counterclockwise reduces it.
Adjust incrementally and thoroughly test the door’s complete closing cycle after each adjustment. Verify the door fully closes and seals properly without reversing prematurely. Accurate down travel is crucial for security.
Force Adjustment Settings
Allstar MVP openers feature force adjustment settings to control the power applied during door operation. These settings dictate how much force the opener uses to overcome resistance when opening or closing. Incorrect force settings can lead to operational issues or safety hazards.
Adjust force settings cautiously, referencing the manual for specific instructions. Excessive force can damage the door, while insufficient force may cause reversal. Prioritize safety and proper door movement during adjustments.
Understanding the Safety Sensors
Allstar MVP garage door openers utilize safety sensors, crucial for preventing accidental door closure on obstructions. These sensors, typically located near the floor, create an invisible beam across the door opening. If the beam is broken – by a person, vehicle, or object – the door will automatically reverse.
Proper alignment and regular testing of these sensors are paramount for safe operation. Misaligned or dirty sensors can cause malfunctions, compromising safety features. Always verify sensor functionality before each use.
Sensor Alignment and Testing
To ensure optimal safety, regularly check the alignment of your Allstar MVP’s safety sensors. The sensors should face each other directly, with the indicator lights illuminated steadily. If a light is blinking or off, gently adjust the sensor until both lights are solid.
Test the sensors by placing an object in the door’s path while closing. The door should immediately reverse. Repeat this test several times. If the door fails to reverse, re-align the sensors or consult a qualified technician.
Troubleshooting Safety Sensor Issues
If your Allstar MVP garage door isn’t closing, safety sensors are often the culprit. First, verify the sensors aren’t obstructed by debris or misaligned – solid indicator lights are key. Check wiring connections at both the sensors and the opener unit for looseness or damage.
If problems persist, clean the sensor lenses with a soft cloth. A faulty sensor may require replacement; consult the manual for part numbers. Always prioritize safety and disconnect power before inspecting wiring.
Wiring Diagrams and Electrical Information
The Allstar MVP garage door opener utilizes standard residential electrical wiring. Detailed wiring diagrams are crucial for safe installation and troubleshooting; refer to the full manual for specific schematics. Ensure power is disconnected at the breaker before attempting any electrical work.
Typical connections include power supply (120V), safety sensors, and remote receiver. Incorrect wiring can damage the opener or create a safety hazard. If unsure, consult a qualified electrician for assistance.
Compatibility with ismartgate
The Allstar MVP opener can be integrated with the ismartgate system, transforming your garage door into a smart home device. This allows for remote control, monitoring, and automation via smartphone or other compatible devices.
Integration typically involves connecting an ismartgate module to the opener’s wiring. Check ismartgate’s website for specific compatibility details and installation instructions for the Allstar MVP model. Enjoy enhanced convenience and security with smart access control.
Digi-Code Radio Control Information
Your Allstar MVP opener utilizes Digi-Code radio controls for reliable remote operation. These transmitters are designed for use with garage doors and gate openers, offering years of dependable service. The system allows selection from a vast number of possible codes – 19683, to be precise – minimizing interference and enhancing security.
Proper programming is crucial for optimal performance. Refer to the programming section of this manual for detailed steps on pairing your Digi-Code remotes with the opener.
ANSI/UL 325 Compliance
The Allstar MVP garage door opener is engineered and manufactured to meet the stringent safety standards outlined in ANSI/UL 325. This compliance ensures the product incorporates critical safety features, protecting users from potential hazards. The safety manual adheres to these standards, providing guidance on safe installation and operation.
Regularly reviewing these guidelines is vital for maintaining a safe operating environment. Adherence to ANSI/UL 325 demonstrates a commitment to user safety and product reliability.
Where to Download the Manual
Accessing the complete Allstar MVP garage door opener manual is straightforward. Users can readily download the PDF manual online for convenient viewing and reference. Numerous websites host the documentation, offering easy access to installation guides, troubleshooting tips, and safety precautions.
Ensure you obtain the correct manual version corresponding to your specific MVP model. Downloading provides a readily available resource for all your opener-related needs, promoting informed operation and maintenance.