
Reznor Heater Troubleshooting Manual: A Comprehensive Guide
This manual delivers essential guidance for diagnosing and resolving issues with Reznor heaters, ensuring optimal performance and safety for users seeking warmth.
Understanding Your Reznor Heater
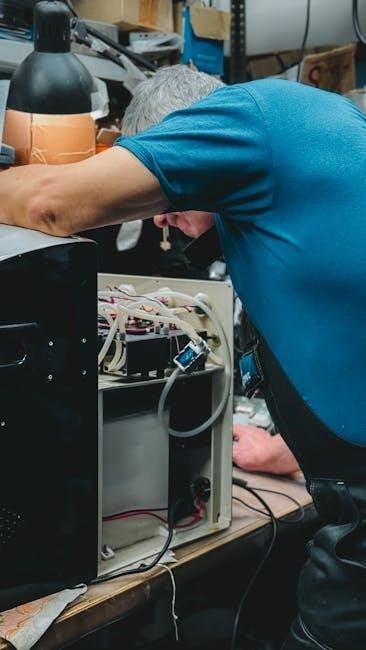
Reznor heaters are renowned for their robust construction and efficient heating capabilities, commonly utilized in industrial, commercial, and agricultural settings. Familiarizing yourself with your specific model is crucial; locate the model number and refer to the accompanying documentation for detailed specifications and diagrams. Understanding the core components – the burner assembly, heat exchanger, gas valve, thermostat, and fan – is paramount for effective troubleshooting.
These heaters operate by drawing in air, heating it via combustion, and distributing the warm air throughout a space. Proper ventilation is essential for safe operation, as combustion produces exhaust gases. Knowing the heater’s operational parameters, like BTU output and gas type, will aid in diagnosing performance issues. Regular maintenance, including filter checks, contributes significantly to longevity.
Safety Precautions Before Troubleshooting
Prioritize safety before attempting any troubleshooting on your Reznor heater. Always disconnect the power supply – both electrical and gas – to prevent accidental ignition or electric shock. Never work on a heater while it’s hot; allow it to cool completely. Ensure adequate ventilation to avoid the buildup of combustible gases, particularly carbon monoxide.
Wear appropriate personal protective equipment, including safety glasses and gloves. If you smell gas, immediately shut off the gas supply and evacuate the area, contacting a qualified technician. Do not attempt repairs if you are unfamiliar with gas or electrical systems; professional assistance is recommended. Ignoring these precautions can lead to serious injury or property damage.
Common Reznor Heater Problems & Solutions
Reznor heaters can experience several common issues. A heater failing to turn on often stems from power supply problems – check the circuit breaker and wiring. Lack of heat frequently indicates ignition system failures, requiring inspection of the pilot light and gas valve; Reduced heat output can be caused by a dirty air filter, restricting airflow. Unusual noises might signal fan motor issues or obstructions.
Addressing these promptly prevents further damage. Regularly inspect and clean the heater, and always follow the manufacturer’s guidelines for maintenance. Simple fixes, like filter replacement, can often restore optimal performance. For complex issues, consult a qualified HVAC technician.
Heater Won’t Turn On: Power Supply Issues
If your Reznor heater refuses to power on, begin with the electrical supply. First, verify the circuit breaker hasn’t tripped; reset if necessary. Inspect the power cord for any visible damage – cracks or fraying indicate a need for replacement. Confirm the heater is securely plugged into a functioning outlet. Use a voltage tester to ensure the outlet delivers power.
Check the heater’s internal fuse, if accessible, and replace it with the correct amperage rating. A faulty thermostat can also prevent startup; testing it is crucial. If problems persist, consult a qualified electrician to rule out wiring issues.
No Heat Output: Ignition System Failures
When a Reznor heater powers on but produces no heat, the ignition system is a prime suspect. Begin by verifying the gas supply is active and the shut-off valve is open. A common issue is a dirty or failing pilot light assembly; clean or replace it as needed. Inspect the igniter for visible damage or weakness – a weak spark won’t ignite the gas.
Check the flame sensor; a dirty sensor can prevent the heater from recognizing a flame. A malfunctioning gas valve could also be the culprit, requiring professional diagnosis and repair. Always prioritize safety when dealing with gas appliances.
Diagnosing Ignition Problems
Effective diagnosis of ignition issues requires a systematic approach; Start by visually inspecting all components for obvious damage – cracked igniters, corroded wires, or a dirty pilot assembly. Test the igniter with a multimeter to confirm it’s receiving voltage and producing a strong spark. Verify the flame sensor is clean and properly positioned to detect the pilot flame.
Pay close attention to gas pressure; low pressure can prevent successful ignition. If the pilot light won’t stay lit, suspect a faulty thermocouple or a gas valve issue. Remember to turn off the gas supply before performing any repairs.
Checking the Pilot Light Assembly
Begin by visually inspecting the pilot light assembly for any obstructions, such as dust or debris, that could hinder proper ignition. Carefully clean the assembly with a soft brush or compressed air. Examine the pilot orifice for clogs; a small wire can often clear minor blockages.
Ensure the thermocouple is positioned correctly within the flame; it must be heated by the flame to maintain gas flow. Test the thermocouple with a multimeter to verify its functionality. A weak or faulty thermocouple will prevent the main burner from igniting, even if the pilot is lit.

Gas Valve Issues and Troubleshooting
A malfunctioning gas valve is a common cause of heating problems. First, verify the gas supply is turned on at the main shut-off valve. Inspect the gas valve for any visible damage or corrosion. Listen for a clicking sound when attempting to ignite the heater; a lack of clicking may indicate a faulty valve.
Carefully test the valve’s operation using a multimeter, checking for proper voltage and continuity. Caution: Gas valve troubleshooting should only be performed by qualified individuals due to the risk of gas leaks and explosions. If unsure, contact a professional immediately.
Addressing Heat Exchanger Concerns
The heat exchanger is crucial for safe and efficient heating. Inspect for signs of cracking, rust, or corrosion, which can lead to dangerous carbon monoxide leaks. A visual examination with a flashlight is a good starting point, but a professional inspection is recommended for thorough assessment.
Reduced heating efficiency or a noticeable odor could indicate heat exchanger problems. Never operate the heater if you suspect a compromised heat exchanger. Immediate shutdown and professional repair are essential to prevent carbon monoxide poisoning and ensure continued safe operation of your Reznor heater.
Identifying Heat Exchanger Problems
Visual inspection is the first step. Look for physical damage like cracks, blistering, or excessive rust on the heat exchanger surfaces. Soot buildup can also signal incomplete combustion and potential exchanger issues. A compromised heat exchanger may exhibit reduced heating capacity, requiring the unit to run longer to achieve the desired temperature.
Listen for unusual noises, such as popping or rattling sounds, which could indicate internal damage. Always prioritize safety; if you suspect a problem, immediately shut down the heater and contact a qualified technician for a professional assessment and repair. Ignoring these signs can lead to dangerous carbon monoxide leaks.
Carbon Monoxide Risks & Prevention
Carbon monoxide (CO) is a silent, odorless, and deadly gas produced by incomplete combustion; A faulty Reznor heater can release CO, posing a severe health risk to occupants. Install CO detectors on every level of your home, especially near sleeping areas, and test them monthly.
Ensure proper ventilation by never blocking air inlets or outlets. Regular professional inspections and maintenance are crucial to identify and address potential CO leaks. Never ignore symptoms like headache, dizziness, nausea, or confusion – evacuate immediately and call emergency services. Prioritize safety and preventative measures to protect your family.
Troubleshooting Flame Issues
Consistent, stable flame quality is vital for efficient heating. A yellow flame indicates incomplete combustion, often due to insufficient air or a gas supply problem. A blue flame signifies proper combustion and optimal performance. If you observe a yellow flame, immediately investigate the air-fuel mixture.
Adjusting the air-fuel mixture involves carefully modifying the gas valve settings, but always consult a qualified technician for this procedure. Improper adjustments can create dangerous conditions. Check for obstructions in the burner or vent system that might disrupt airflow. Regular cleaning and maintenance are key to maintaining a healthy flame.
Yellow Flame vs. Blue Flame
Flame color is a crucial indicator of combustion efficiency and safety. A vibrant blue flame signifies complete combustion, meaning the gas is burning cleanly and efficiently, maximizing heat output. Conversely, a yellow or orange flame indicates incomplete combustion, producing carbon monoxide – a dangerous, odorless gas.
Yellow flames often result from insufficient air mixing with the gas. This can be caused by blocked air inlets, a faulty gas valve, or improper venting. Never operate a heater with a persistent yellow flame. Immediate investigation and correction are essential to prevent carbon monoxide poisoning and ensure safe operation.
Adjusting Air-Fuel Mixture
Proper air-fuel mixture is vital for efficient combustion and a clean, blue flame. Most Reznor heaters feature adjustment screws or dials near the gas valve to regulate this mixture. Carefully adjust these controls, observing the flame color as you do so. Slowly increase airflow if the flame appears yellow or orange, aiming for a stable, blue flame.
Always consult the heater’s manual for specific adjustment procedures, as methods vary between models. Incorrect adjustments can lead to inefficient operation or dangerous carbon monoxide production. If you are uncomfortable making these adjustments, or if the problem persists, contact a qualified HVAC technician.
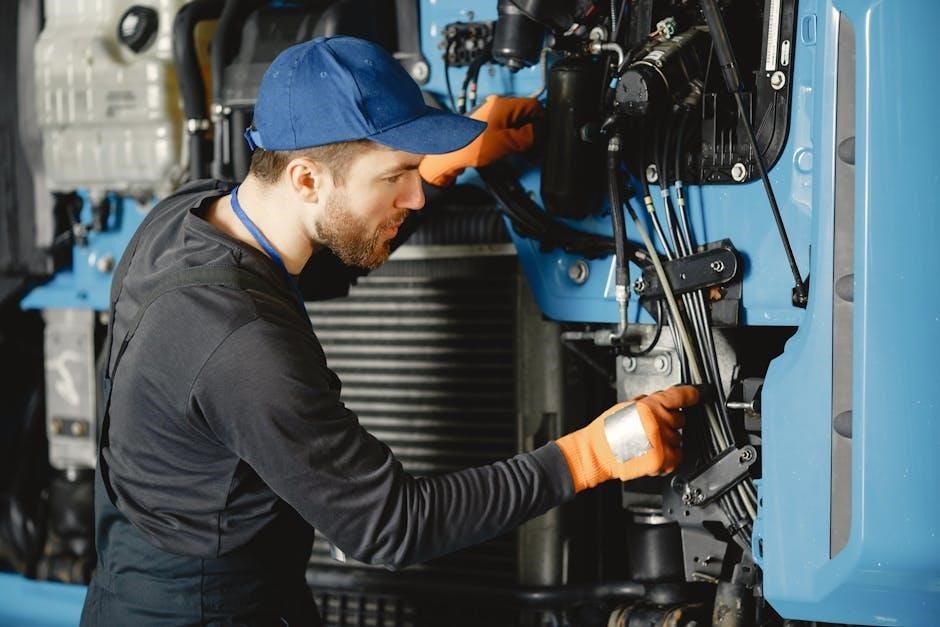
Electrical Component Troubleshooting
Electrical issues can prevent a Reznor heater from functioning correctly. Begin by carefully inspecting all wiring for loose connections, corrosion, or damage. Always disconnect power before performing any electrical work! Use a multimeter to test for continuity in wires and check voltage levels at key components.
Faulty wiring is a common culprit, but also examine the heater’s control board, relays, and safety switches. A blown fuse or tripped circuit breaker should also be investigated. If you lack experience with electrical troubleshooting, it’s best to consult a qualified technician to avoid potential hazards.

Checking the Thermostat
A malfunctioning thermostat is a frequent cause of Reznor heater problems. Begin by verifying the thermostat’s settings and ensuring it’s calling for heat; Use a multimeter to test the thermostat’s continuity; it should close the circuit when the set temperature is reached. If there’s no continuity, the thermostat may be faulty and require replacement;
Consider ambient temperature and ensure the thermostat isn’t exposed to drafts or direct sunlight, which can affect its readings. Carefully inspect the thermostat’s wiring for loose connections or corrosion. A simple thermostat adjustment or replacement can often restore proper heater operation.
Faulty Wiring and Connections
Loose or corroded wiring can disrupt the electrical flow to your Reznor heater, causing it to malfunction. Begin by disconnecting power to the unit before inspecting any wiring. Carefully examine all connections – at the thermostat, heater unit, and power source – for signs of damage or looseness. Tighten any loose screws or connectors, and replace any damaged wiring immediately.
Look for burnt or frayed wires, which indicate a serious electrical issue. Ensure proper grounding to prevent electrical shock. If you’re uncomfortable working with electrical wiring, consult a qualified technician for assistance; safety is paramount.
Fan Motor Problems
A malfunctioning fan motor significantly impacts the heater’s ability to distribute warm air effectively. Common issues include obstructions blocking the fan blades, motor failure due to wear and tear, or capacitor problems. First, disconnect power and inspect the fan for any debris or obstructions. If clear, test the motor for continuity using a multimeter.
A failed capacitor is a frequent culprit; replacement is often straightforward. If the motor still doesn’t run, it likely needs replacing. Always use a compatible replacement motor and follow safety precautions during installation. Ignoring fan issues can lead to overheating.
Fan Not Spinning: Obstructions & Motor Failure
When the fan fails to spin, the initial step involves a thorough inspection for obstructions. Debris like dust, lint, or foreign objects can physically block the fan blades, preventing rotation. Disconnect the power supply before attempting any inspection or removal of obstructions. If no obstructions are found, the issue likely resides within the fan motor itself.
Motor failure can stem from worn bearings, damaged windings, or electrical faults. Testing the motor with a multimeter can confirm its functionality. A lack of continuity indicates a failed motor requiring replacement; Always prioritize safety and use a compatible replacement part.
Capacitor Issues with the Fan Motor
Fan motors often rely on capacitors to provide the initial torque needed for startup and sustained operation. A failing capacitor is a common cause of a fan that hums but doesn’t spin, or spins weakly. Visually inspect the capacitor for bulging, leaking, or other signs of damage. Use a capacitor tester to verify its capacitance; a significant deviation from the rated value indicates failure.
Replacing a faulty capacitor is generally straightforward, but always discharge the capacitor before handling it to avoid electric shock. Ensure the replacement capacitor has the same voltage and capacitance ratings as the original. Incorrect capacitor values can damage the motor.
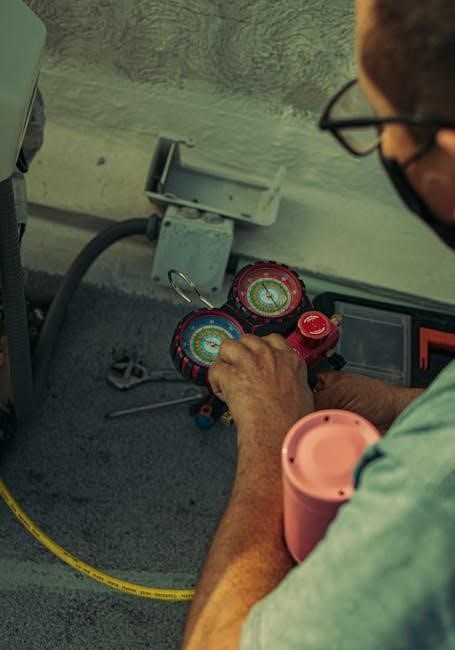
Gas Supply Troubleshooting
Insufficient gas supply is a frequent culprit when a Reznor heater fails to ignite or maintain a consistent flame. Low gas pressure can stem from several sources, including a depleted propane tank or reduced natural gas pressure from the utility company. Symptoms include a weak pilot light, intermittent heating, or complete failure to ignite. First, verify that other gas appliances are functioning correctly.
Carefully check the gas shut-off valve leading to the heater, ensuring it’s fully open. If using propane, inspect the tank level. Contact your gas provider if you suspect a broader pressure issue; never attempt to adjust the regulator yourself.
Low Gas Pressure Symptoms
Recognizing low gas pressure is crucial for effective Reznor heater troubleshooting. Common indicators include a pilot light that struggles to stay lit, frequently extinguishing even after relighting attempts. The heater may ignite, but the flame will appear weak and yellowish, lacking the robust blue hue of proper combustion. You might experience intermittent heating cycles, where the heater fires briefly then shuts off.
A noticeable drop in heat output, even with the thermostat set high, is another telltale sign. Listen for a clicking sound from the gas valve, indicating it’s attempting to open but lacking sufficient pressure. These symptoms suggest a potential issue with the gas supply itself.
Checking the Gas Shut-Off Valve
Begin by locating the gas shut-off valve, typically found on the gas supply line leading directly to the Reznor heater. Ensure the valve is in the fully “on” position, aligned with the gas pipe. Visually inspect the valve for any signs of damage or corrosion. Slowly and carefully turn the valve off, then back on again to dislodge any potential debris obstructing the gas flow.
If the heater still exhibits low gas pressure symptoms, check other gas appliances in your home to determine if the issue is isolated to the heater. Never attempt to repair a damaged gas valve yourself; contact a qualified professional immediately.
Filter Maintenance and Replacement
Regular filter maintenance is crucial for optimal Reznor heater performance and efficiency. A dirty air filter restricts airflow, leading to reduced heat output and potential overheating. Symptoms of a clogged filter include decreased warm air volume, longer heating cycles, and increased energy consumption. Inspect the filter monthly during peak usage and replace it when visibly dirty.
Proper filter replacement involves turning off the heater, locating the filter access panel, and removing the old filter. Install the new filter with the airflow direction arrow pointing towards the heater. Always use the correct filter size and type recommended by the manufacturer.
Dirty Air Filter Symptoms
A compromised air filter significantly impacts Reznor heater functionality, manifesting in several noticeable symptoms. Reduced airflow is a primary indicator, resulting in weaker heat output and a longer time to reach the desired temperature. Increased energy bills are common, as the heater works harder to compensate for the restricted airflow. Dust accumulation around the heater suggests the filter isn’t effectively trapping particles.
Unusual noises, like whistling or straining, can also signal a dirty filter. The heater may cycle on and off more frequently, attempting to maintain temperature. Ignoring these signs can lead to decreased efficiency and potential component damage.
Proper Filter Replacement Procedures
Before beginning, always disconnect the Reznor heater from the power source to ensure safety. Locate the filter access panel, typically on the unit’s side or bottom, and remove it. Note the filter’s orientation – airflow direction is usually indicated by an arrow. Carefully remove the dirty filter, avoiding dislodging dust into the heater.
Inspect the filter compartment for debris and clean it thoroughly. Insert the new filter, ensuring the airflow arrow points in the correct direction. Replace the access panel securely. Regular filter changes, typically every 1-3 months, maintain optimal performance and prolong heater life.
Advanced Troubleshooting: Control Boards
Control board issues often manifest as erratic heater behavior or complete failure; Visually inspect the board for burnt components, swollen capacitors, or damaged traces – always with the power disconnected. Check for loose connections and reseat any suspect wiring. A multimeter can test for voltage at designated test points, comparing readings to the schematic.
Attempt a control board reset by cycling the power switch or locating a dedicated reset button (refer to the unit’s manual). If problems persist, professional diagnosis and potential board replacement are recommended, as these components are complex and require specialized knowledge.

Identifying Control Board Failures
Control board failures present in several ways: the heater may not respond to thermostat commands, exhibit inconsistent heating cycles, or fail to ignite. Look for error codes displayed on the unit, referencing the manual for their meaning. Observe for flickering lights or unusual noises emanating from the control board area. A lack of voltage at the gas valve or blower motor when it should be present strongly suggests a board issue.
Carefully examine components for physical damage like burns or bulges. Testing with a multimeter can reveal shorts or open circuits, but requires technical expertise.

Control Board Reset Procedures
Attempting a reset is a simple first step when suspecting control board glitches. First, disconnect power to the heater at the breaker for at least 60 seconds. This fully discharges capacitors. Next, locate the reset button – often a small recessed button – on the control board itself; consult your heater’s manual for its exact location.
Press and hold the reset button for several seconds, then restore power. Observe if the heater now responds correctly. If the problem persists, avoid repeated resets, as this can indicate a more serious underlying fault requiring professional attention.
Finding Reznor Heater Parts & Manuals
Locating replacement parts and comprehensive manuals is crucial for effective Reznor heater maintenance. Start with the Reznor website; they often host digital copies of manuals for various models. Authorized Reznor distributors are excellent sources for genuine parts, ensuring compatibility and quality. Online retailers specializing in HVAC components also carry a wide selection.
When ordering parts, have your heater’s model and serial number readily available. Detailed manuals provide exploded diagrams, aiding in correct part identification. Always prioritize genuine Reznor parts to maintain heater efficiency and safety standards.
When to Call a Professional
Prioritize safety – certain Reznor heater issues demand professional attention. If you detect a gas leak, immediately evacuate and contact your gas company and a qualified HVAC technician. Electrical problems, like persistent sparking or burning smells, require an expert’s assessment. Complex issues involving the control board or heat exchanger are best left to professionals.
Attempting repairs beyond your skillset can be dangerous and void warranties. A qualified technician possesses the tools, knowledge, and certifications to diagnose and fix problems safely and effectively, ensuring your heater operates optimally.